Make Your Own Epoxy Table – Step-by-Step Guide
A river table made of epoxy resin combines natural wood with modern design. By pouring clear or pigmented epoxy resin, unique tabletops are created where every wood grain and every resin layer defines the character of the furniture piece. With high-quality systems from R&G, even ambitious DIY users can safely and reliably create their own epoxy table.
What Is an Epoxy River Table?
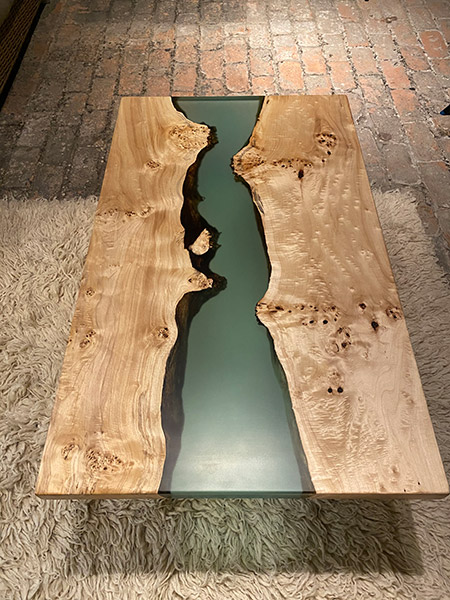
An epoxy river table is a tabletop made from two or more wooden slabs with epoxy resin poured between them like a flowing “river.” Clear or colored casting resin is typically used. The key factors for a high-quality result are the correct resin and hardener, controlled processing, and complete curing of the epoxy resin.
In the following film, we show you how to produce professional rivertables with high-quality epoxy casting resins from R&G!

Subtitle please select here
Materials and Preparation for Your Epoxy Table
To build a durable epoxy river table, you will need:
- Dry, clean wood (ideally kiln-dried)
- A suitable epoxy casting resin with matching hardener
- Mixing containers, precision scale, and mixing tool
- Mold materials (e.g., coated boards)
- Release agent for the mold
- Heat gun or gas torch for removing air bubbles
- Sanding materials for sanding and polishing
At this stage, it is recommended to select a suitable epoxy casting resin specifically designed for river tables and thicker pours.
Which Epoxy Resin Is Suitable for River Tables?
| Casting Resin Type | Description | Pouring Thickness | Working Time | Curing Time | Mixing Ratio Resin : Hardener | Price |
|---|---|---|---|---|---|---|
| Epoxy Casting Resin CLEAR + Hardener W 300 | Suitable for lower pouring heights in one operation; multi-layer pours possible; cures tack-free even in thin layers (extended curing time). | up to approx. 2 cm | approx. 300 minutes | 24–72 hours | 100 : 35 (by weight) | € |
For river tables with clear or slightly tinted resin areas, an epoxy casting resin is required that reacts in a controlled manner even with longer working times and cures reliably. Especially in multi-layer pours and when working in thin layers, low heat development is essential to prevent stress cracks, overheating, or clouding.
The clear epoxy casting resin combined with Hardener W 300 is specifically designed for such applications and is ideal for step-by-step pouring of epoxy tabletops and river tables.
Step by Step: How to Make an Epoxy Tabletop
Step 1: Prepare and Seal the Wood
The wood must be clean, dry, and dust-free. Cracks, knots, and porous areas should first be sealed with a thin layer of epoxy resin. This initial seal coat prevents air from escaping from the wood during the main pour and forming bubbles.
Work intentionally in thin layers, allowing each layer to cure before proceeding.
Step 2: Build the Mold and Apply Release Agent
The mold defines the final shape of the tabletop and must be completely sealed. All surfaces that will come into contact with resin should be treated with a suitable release agent. This ensures that the river table can be easily demolded after full curing.
Step 3: Mix Resin and Hardener Correctly
A crucial aspect of working with epoxy systems is the precise mixing of resin and hardener.
- First calculate the required quantity using an epoxy resin calculator.
- Weigh resin and hardener accurately using a digital precision scale.
- Mix both components thoroughly using a mixing tool (e.g., drill with mixing paddle).
- Transfer the mixture into a clean container and mix again.
Always mix strictly according to the manufacturer’s instructions. Only correct mixing ensures that the epoxy resin will cure completely.
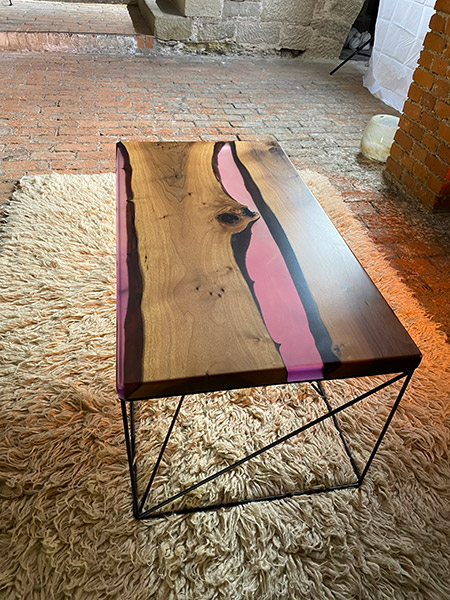
Step 4: Add Pigments – Coloring Your River Table
If you want to create a colored epoxy river table, add transparent dyes or pigments after thoroughly mixing resin and hardener. Stir evenly until the desired color tone is achieved.
Depending on the pigment type, transparent or opaque effects are possible. Do not exceed the recommended dosage, as excessive pigment can interfere with proper curing. For multi-layer pours, it is recommended to color each epoxy layer consistently.
Step 5: Degassing and Pouring the Resin
After mixing, let the resin rest for approximately 15–30 minutes. During this time, trapped air bubbles rise to the surface. Remove surface bubbles carefully using a heat gun or gas torch (observe fire safety precautions).
When pouring:
- Pour large volumes in multiple steps
- Observe the maximum recommended pouring height for thick layers
- Allow each layer to cure before applying the next
This prevents overheating and internal stress cracks.
Step 6: Monitor the Curing Process
The curing of epoxy resin is highly temperature-dependent. The ideal ambient temperature is approximately 20 °C (68 °F). Placing a fan with cool air above the casting can help prevent heat accumulation.
Depending on the system, full curing takes between 24 and 72 hours. Further processing should only begin after complete curing.
Step 7: Demolding, Sanding, and Polishing
After full curing, remove the epoxy table from the mold. Surface finishing then begins:
- Coarse sanding to level the surface
- Progressive fine sanding
- Optional polishing for a high-gloss finish
Patience during sanding and polishing enhances the depth and clarity of the epoxy resin.
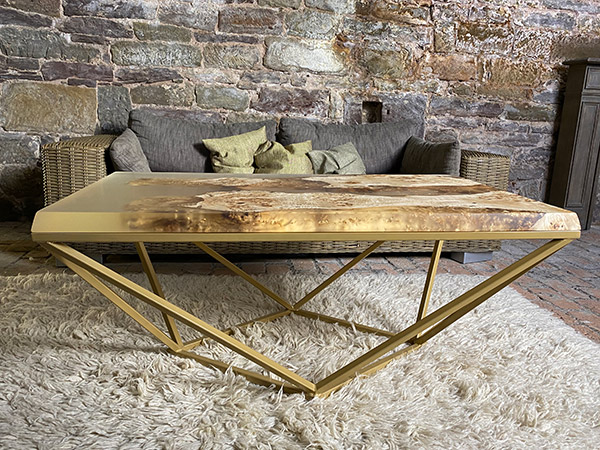
Durability and Care of an Epoxy Table
A properly manufactured epoxy table is highly durable, moisture-resistant, and mechanically stable. With proper care, the tabletop maintains its appearance for many years. For long-term clarity, especially with light or transparent resin, additional UV protection is recommended.
FAQ – Frequently Asked Questions About Epoxy Tables
What Do I Need to Build an Epoxy Table?
You need dry, clean wood, a suitable epoxy casting resin with matching hardener, a sealed mold, mixing containers, a precision scale, and a mixing tool. You will also need a release agent, a heat gun or torch for bubble removal, and sanding materials for finishing. Personal protective equipment is recommended when working with epoxy systems.
Can You Make a Resin Table Yourself?
Yes, building a resin or epoxy table is possible with proper preparation and high-quality materials. Following a structured step-by-step approach and maintaining the exact mixing ratio of resin and hardener is essential. For river tables with thicker pours, only use a casting resin designed for such applications.
How Much Epoxy Resin Do You Need for a Table?
The required resin quantity depends on the length, width, and thickness of the poured area. Wide “river” sections may require larger volumes. Using a resin calculator ensures accurate planning, as insufficient material can interrupt the pouring process.
How Long Does an Epoxy Table Last?
A correctly manufactured epoxy table is extremely durable. With proper curing and normal use, it can remain stable and visually appealing for many years. Epoxy resin is moisture-resistant and mechanically strong. Additional surface sealing can further extend its lifespan.
What Does Epoxy Resin Not Stick To?
Epoxy resin does not adhere well to silicone-treated, waxed, or heavily oiled surfaces. Certain plastics such as polyethylene and polypropylene are also non-adhesive. Therefore, applying a suitable release agent to the mold is essential for easy demolding.
What Problems Occur Frequently With Resin Tables?
Common issues include bubble formation, overheating during large pours, and sticky or incompletely cured surfaces. These problems often result from incorrect mixing ratios, excessive pouring thickness, or insufficient curing time. Working in thin layers, controlling curing conditions, and removing air bubbles promptly help prevent these issues.

